Word 2013 can take a list of names and addresses and print them all, or a selected few, on a sheet of labels. This trick is more of a mail-merge feature than a true label-making ability. Follow these steps:
Start a new document in Word and click the Mailings tab.

All action in the remaining steps involves command buttons on the Mailings tab.
From the Start Mail Merge button's menu, choose Labels.
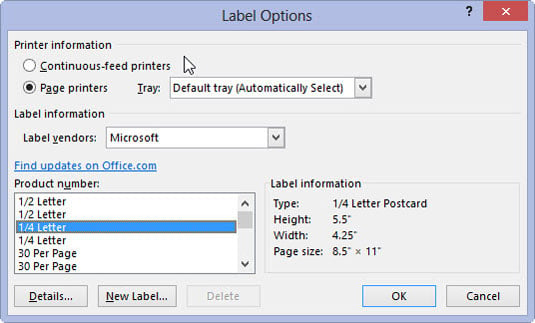
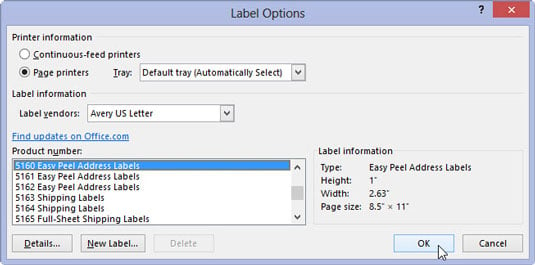
The Label Options dialog box appears.
Choose the label vendor and product number representing the sheet of labels on which you're printing.

For example, to print on a sheet of standard Avery address labels, use Avery catalog number 5160.
Click OK.
Word builds a table in your document, one with cells perfectly aligned to match the labels on the sheet you selected. (The gridlines may be hidden, but the table is still there.)
Do not edit or format the table! It’s perfect.
Use the Select Recipients button's menu to create a recipient list for your labels.

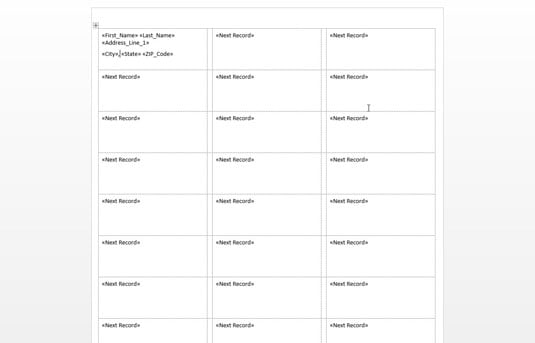
After you create or choose a recipient list, Word fills in all but the first cell (label) in the table with the Next Record field. This field directs Word to duplicate the label layout from the first label onto the remaining labels on the page. Before that can happen, though, you need to build the first label.
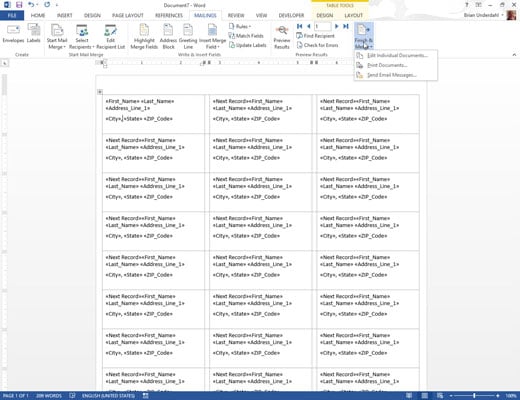
Use the Insert Merge Field button to insert fields to help create and format the first label.
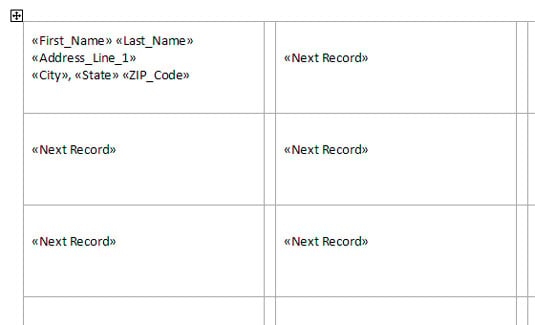
Clicking the Insert Merge Field command’s menu button displays a list of fields associated with the address list you chose in Step 6. Choose a field from the list, such as First Name. Then type a space and insert the Last Name field from the list. Use the fields, as well as your keyboard, to build the first label.
Press the Shift+Enter key combination at the end of each line in a label. Shift+Enter inserts a soft return, which keeps the lines in the label tightly together.
Check the layout.
Ensure that spaces appear between the fields that need them, and also commas and other characters.
From the Write & Insert Fields group, click the Update Labels button.

Word populates the remaining cells in the table with the same fields. This is why you check the layout in Step 8: If you find a mistake now, you have to fix every dang-doodle label rather than a single label.
Choose the proper command from the Finish & Merge button's menu:
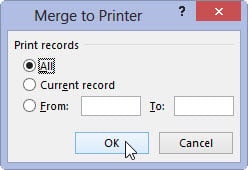
To save the document and print, choose Edit Individual Documents.
To print only, choose Print Documents.
Click OK in the Merge to Print dialog box or the Merge to New Document dialog box.
Your document is now merged. Don’t forget to save.