


Assign a descriptive name to a cell or range in Excel 2010 to help make formulas in your worksheets much easier to understand and maintain. Range names make it easier for you to remember the purpose of a formula, rather than using obscure cell references.
For example, the formula =SUM(Qtr2Sales) is much more intuitive than =SUM(C5:C12). In this example, you would assign the name Qtr2Sales to the range C5:C12 in the worksheet.
Naming cells
To name a cell or range, follow these steps:
Select the cell or cell range that you want to name.
You also can select noncontiguous cells (press Ctrl as you select each cell or range).
On the Formulas tab, click Define Name in the Defined Names group.
The New Name dialog box appears.
 Use the New Name dialog box to assign a name to the selected range.
In the Name text box, type up to a 255-character name for the range.
Range names are not case-sensitive; however, range names must follow these conventions:
The first character must be a letter, an underscore, or a backslash.
No spaces are allowed in a range name.
The range name should not be the same as a cell address. For example, you can't name a range U2 or UB40, but BLINK182 and ABBA are just fine.
Click OK.
Alternatively, you can enter a range name into the Name box located at the left end of the Formula bar and press Enter to create the name.
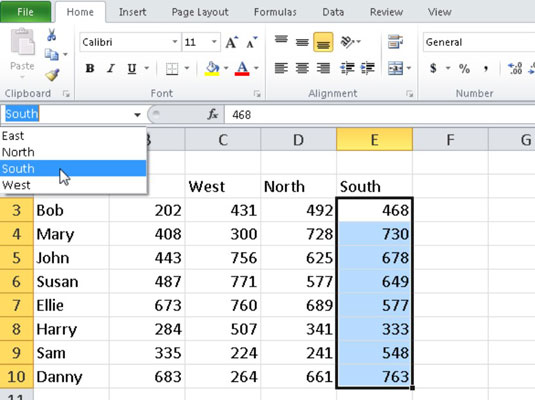
Using a named range
To use a named cell or range, click the down arrow in the Name box at the left end of the Formula bar. Select the range name you want to access, and Excel highlights the named cells.
You also can use range names with the Go To dialog box, to make it easier to locate specific areas of a worksheet. Press F5 to display the Go To dialog box, select the range name you want to jump to, and click OK.
You can insert range names into formulas just like they were normal cell references. Be careful using named multi-cell ranges, though. Remember to use functions that require a range instead of a single cell reference — such as MAX, SUM, or AVERAGE — or else you'll get an error message.
Did this glimpse into Excel data management leave you longing for more information and insight about Microsoft's popular spreadsheet program? You're free to test drive any of the For Dummies eLearning courses. Pick your course (you may be interested in more from Excel 2010), fill out a quick registration, and then give eLearning a spin with the Try It! button. You'll be right on course for more trusted know how: The full version's also available at Excel 2010.

