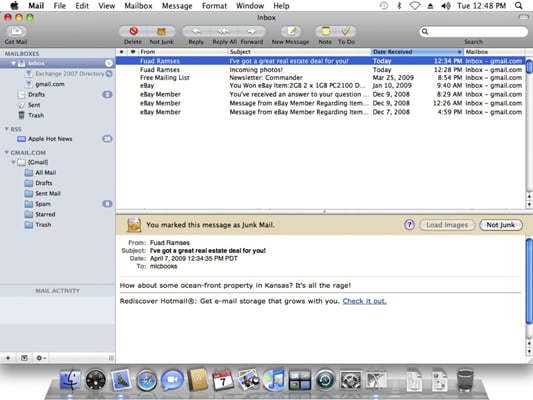
No one wants spam and junk mail. Thankfully, Mac OS X Snow Leopard’s Apple Mail has a net that you can cast to collect junk mail before you have to read it. You can mark any message in the message list as Junk Mail. Select the unwanted refuse in the message list and then click the Junk button on the Mail window toolbar, which marks the message. If a message is mistakenly marked as junk, but you actually want it, display the message in the preview box and then click the Not Junk button at the top of the preview box.
For more automated control, Apple Mail has a sophisticated Junk Mail filter that you actually train to recognize what’s junk. After you train Mail to recognize spam with a high degree of accuracy, turn it to full Automatic mode, and it moves all those worthless messages to your Junk folder.
To customize and train the Junk Mail filter, follow these steps:
Open the Preferences dialog from your Mail menu and click Junk Mail.
The Junk Mail settings appear.
Set it to Mail in Training mode, using the Mark as Junk Mail, But Leave It in My Inbox option.
Junk Mail then takes its best shot at determining what’s junk.
When you receive more mail, mark messages as junk (or mark them as not junk).
You’re actually teaching the Junk Mail feature how to winnow the wheat from the chaff. In Training mode, junk messages aren’t actually moved anywhere; they’re just marked with a particularly fitting, grungy brown color.
After you’re satisfied that the Junk Mail filter is catching just about everything that it can, display the Mail preferences again and choose the Move It to the Junk Mailbox option.
Mail creates a Junk folder and prompts you for permission to move all junk messages to this folder. After you review everything in the Junk folder, you can delete what it contains and send it to the Trash folder. To save a message from junkdom, click the Not Junk button in the preview window and then drag the message from the Junk folder message list to the desired folder in the Drawer.
Finally, you can create a complete set of custom rules for your Junk Mail filtering by clicking Perform Custom Actions — the Advanced button displays your Junk Mail rule set and allows you to edit your rules.
If you don’t receive a lot of spam — or you want to be absolutely sure that nothing gets labeled as junk until you review it — click the Enable Junk Mail Filtering check box to disable it.
By default, Mail exempts certain messages from Junk Mail status based on three criteria: if the sender is in your Address Book, if you’ve sent the sender a message in the past, or if the message is addressed to you with your full name. To tighten up your Junk Mail filtering to the max, you might want to disable these check boxes as well.
To reset the Junk Mail filter and erase any training that you’ve done, visit the Junk Mail settings in Preferences again and click Reset. Then click the Yes button to confirm your choice.