Listing a piece in your Etsy shop is surprisingly painless — provided you’ve done all the necessary legwork first. (You’ve composed your item title and description, captured a few gorgeous pictures of your piece, set its price, established your shop policies, and so on.)
Start the listing process
After you log in to your Etsy account, follow these steps to begin the listing process:
Hover your mouse pointer over the Your Shop link along the top of any Etsy page.
A list of options appears.
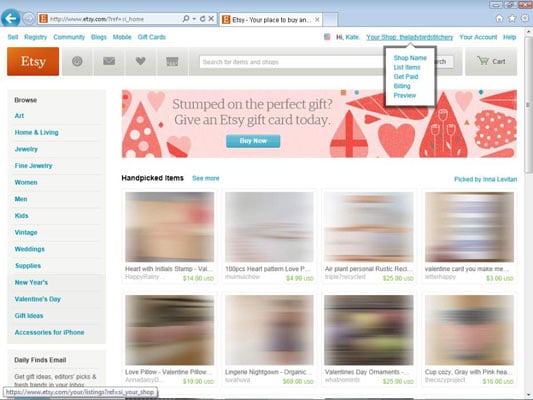
If this is the first listing you’ve created for your Etsy shop, click the List Items option. If you’ve created listings before, click Add New Item.
The List an Item page opens. (Note that this page may look a little different depending on whether this is the first listing created for your shop, as shown here. Nevertheless, the options will be the same.)
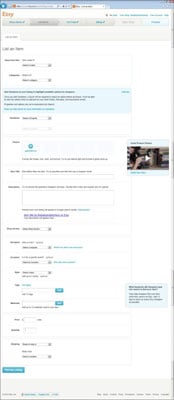
Filling in item information
Your first step is to enter some basic info about the item — who made it, what it is, when it was made, and under which category it should appear. Follow these steps:
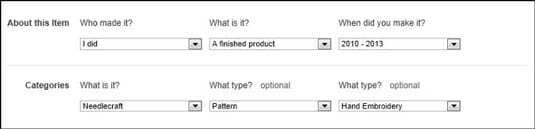
In the About This Item section, click the Who Made It? drop-down list and select the option that best reflects who made the item.
Click the What Is It? drop-down list that appears and indicate whether the item is a finished product or a supply or tool to make things.
Click the When Was It Made? drop-down list that appears and choose the option that best describes when the item was made.
In the Categories section, click the What Is It? drop-down list and choose a category for your item.
Click the What Type? drop-down list that appears and choose a subcategory.
Choose as many subcategories in the What Type? drop-down lists as necessary to categorize your item.
Add listing variations
If your item comes in different sizes, materials, colors, finishes, or what have you, you can indicate this in the Variations section. You can choose up to two variations per item. When buyers purchase your item, they’ll need to choose from the options you set here. Follow these steps:
In the Add Variations section, click the Select a Property drop-down list and choose the correct property.
Examples include Size, Color, Finish, and more.
Add more information about the variation.
For example, choose the color from the drop-down list that appears; alternatively, type the relevant info when prompted and click the Add button. Repeat as needed.
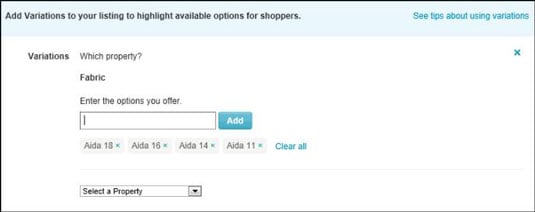
Don’t see the property you need? No worries. You can add a custom one. To do so, click the Select a Property drop-down list, choose Add a New Property, type the name of the property, type the options you offer in the text box that appears, and click the Add button. Repeat as needed.
How to upload images of your item
Next up is adding photos to your listing. Here’s the drill:
In the Photos section, click the Add Photos button.
The Choose File to Upload (PC) or File Upload (Mac) dialog box opens.
Locate and select the first image you want to upload, and click the Open button.
Any images that you upload must be at least 570 pixels wide (the height can vary) and no more than 1,000 pixels wide or high. Note, too, that image files must be of the JPG, GIF, or PNG variety.
Repeat steps 1 and 2 to add more images to your listing.
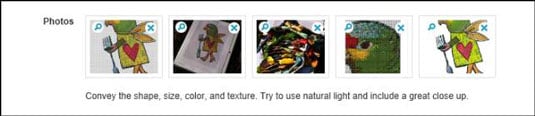
Your listing can feature as many as five images — and that’s how many you want to include!
To change the order in which the images appear in your listing, click the image that you want to move and drag it either left to move it up in the order or right to move it down in the order.
The first image in the list will be the thumbnail image that appears in search results and as the main, featured image in the item listing. Make it a good one!
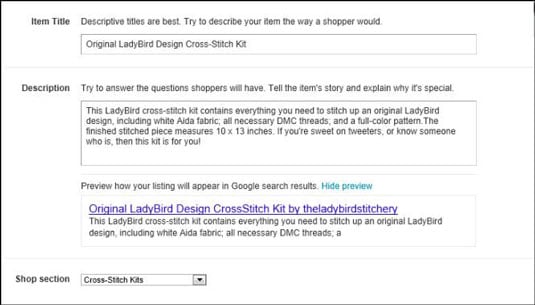
Describe your item
To help convey your item’s fabulousness, you must include an item title and description. And if you’ve created sections for your shop, you can specify the section in which this item should appear. Here’s how:
In the Item Title field, type a title for your item.
In the Description field, enter a description of your item.
Notice that a preview of how your listing will show up in Google search results appears below the Description field.
If you’ve created sections for your shop, click the Shop Section drop-down list and choose the section in which you want the listing to appear. (If you haven’t entered sections for your shop yet, you can do so later, and assign each of your listings to a section you create.)
As you toodle around Etsy, you may notice the occasional listing whose title contains the word reserved. A reserved listing is simply a listing that a seller has posted for a specific buyer — someone with whom she’s communicated previously. For example, if a buyer contacts a seller to create a custom piece, the seller posts the piece as a reserved listing.