If you want to be able to create simple surveys or questionnaires for free, then Google Forms can be a good alternative. Google Forms is built into your Google Drive and enables you to create quick surveys, tally responses, and export your results to Google Sheets. Keep in mind that this is very basic survey functionality. If you need more advanced features, such as complicated logic and advanced reporting, you’ll need to invest in a fully featured survey tool.
Google Forms is a web-based application, which means you don’t have to install any software on your computer. You can use it on different computers, so for example, if you start a survey at work in Google Forms, you can finish it up later at home because the application and the document are stored on Google Drive. No files to transfer.
Start new or open existing Google Forms
In a new browser window on your computer, log in to your Google Drive account and follow these steps:
To start a new form, click the red New button in the upper left.
Choose More, then Google Forms. A new browser window or tab appears displaying a blank Google form (see Figure 1).
To open an existing form, navigate to the form you wish to open on your Google Drive and double-click. The form appears in a new browser window or tab.
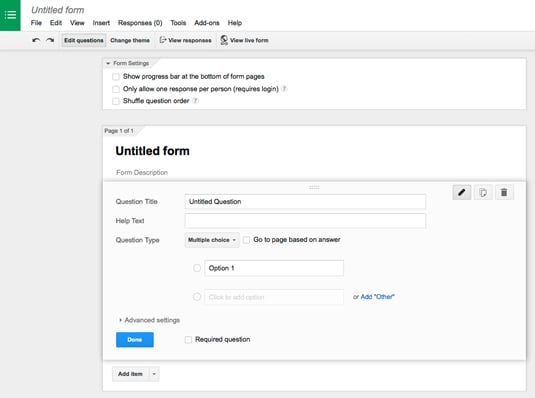 Figure 1: A blank Google form.
You don’t have to manually save your form. Google Drive automatically saves it for you.
At this time, Google Forms is available to use only with a Web browser. Google hasn’t made a mobile app for it yet. However, you can view and edit Google forms on your smartphone or tablet with the Google Drive app. Here’s how:
Log in to your Google Drive account on your device.
Navigate to the form you want to view and tap it. The form displays in the Web browser of your device.
You can edit the form in your device’s browser just as you would on your desktop.
Create a basic form
When you open Google Forms, you’re presented with a page with prompts and fields to fill in. Follow these steps to create your first survey or questionnaire:
Click “Untitled form” to give your questionnaire a proper name.
In the Question Title field, type in the first question you want to ask.
If you want to provide some explanatory text for the question, type it in the Help Text field.
Choose a Question Type.
You have several options, such as multiple choice (when there is only one answer), text (in which you’d write in your response), checkboxes (when you can select multiple answers), and so on.
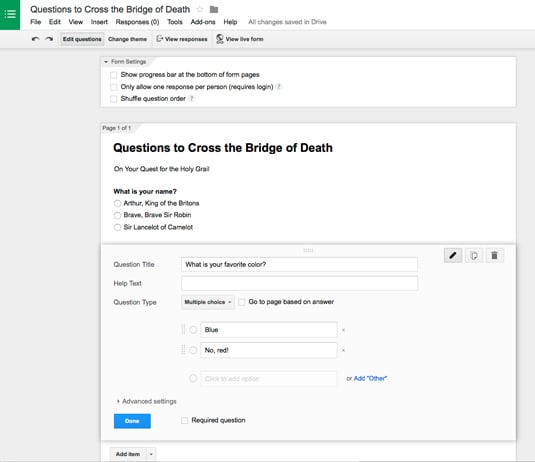
If you choose a question type that has more than one answer, type in the options you want to provide (see Figure 2).
You can have as many options as you want. If you choose Text as the question type, then a text field will appear to fill in.
If you want the user to have to answer the question, then check the Required Question box.
If, for whatever reason, you want the options to appear in a different order for different users, then check the Shuffle Option Order box under Advanced Settings.
When you’re finished with that question, click Add Item, which saves the first question and creates a new blank question.
When you finish creating your survey or questionnaire and are ready to e-mail the form to others to fill out, click the Send Form button. You can copy the link and send it yourself, or you can type in the e-mail addresses of those you want to take the survey.
You can do a few other things to fancy up your survey or questionnaire. You can choose a different theme than the plain vanilla default. You can also add some basic conditional logic to your survey. For example, you can have users go to different follow-up questions based on their answers. This is handy if you have a Yes/No question, and then you want the user to explain the Yes answer in the next question. Choosing No would send the user past that to the following question.