
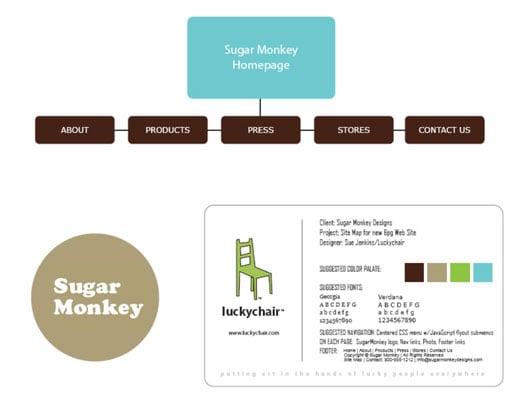
When you create a visual site map, you create a diagram of all the pages on a website, including the interconnectivity of the main pages through navigation and sub-navigation. You then use that information to help gather and define site content, as well as serve as a useful guide when generating the mock-up of the site’s design.
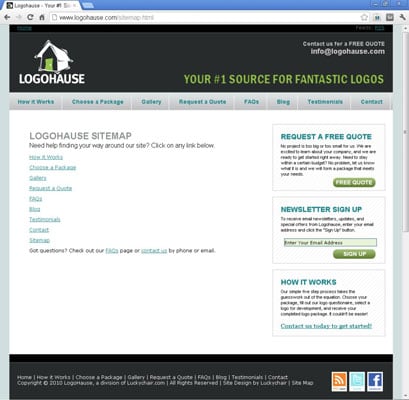
After your site has been fully built, you can use this visual site map again to help you create an HTML Site Map page, which will be added to the site on the remote host server as a tool to help visitors navigate through the site using a list of hypertext links.
What to include on the HTML Site Map page
In its most basic form, the HTML Site Map page contains a list of standard hypertext links to all the pages on a website. This list should include links to the home page, to all the main pages and subpages on the site, and to any other pages on the site that might not be accessible through the main navigation, such as a Privacy Policy or Customer Service page.
For best results, save the page with the filename sitemap.html and present all the hyperlinks to the site’s pages in a simple list format.
To make this finished page accessible, you should include a link to it in the footer as well as adding a link to it within the head of the page. These two actions will help make the site more accessible to
Visitors with disabilities using screen-reading programs or other devices
Visitors with other browsing preferences, such as text-only browsers and browsers with JavaScript disabled
Visitors who want to be able to go directly to any page on the site with a single click, rather than using the site’s main navigation system
Visitors who want to see at a glance all the pages on a given site and know how they’re virtually organized
Create a Site Map page
Creating a Site Map page in HTML is fairly straightforward. It is just a matter of inserting a set of listed hyperlinks that lead to the rest of the pages on the site.
Open the home page of your completed website in Dreamweaver or in your preferred HTML or WYSIWYG code editor.
If you use Dreamweaver, make sure that the Files panel lists your site as the managed site. If not, choose Site→Manage Sites to select your site from the listing.
Choose File→Save As, and when the Save As dialog box opens, save a copy of the home page to the root level of your managed site with the filename sitemap.html.
The new page looks identical to the home page, including all the site’s design elements, logo placement, and navigation.
In the main editable area of the page, select and delete all the home page–specific content.
You now have room to insert a list of hyperlinks.
Place your cursor at the top of the empty area and type the names of all the pages on the site, including the Site Map page, with one name per line, as they appear on the visual site map.
For example, use the page names Home, About, Products, Press, Stores, Contact Us, and Site Map.
Select all the words and convert them into an unordered list, thereby converting each page name into a list item.
The HTML code for the Site Map page should use the unordered list tags, as shown in the following sample code:
<ul>
 <li>Home</li>
 <li>About</li>
 <li>Products</li>
 <li>Press</li>
 <li>Stores</li>
 <li>Contact Us</li>
 <li>Site Map</li>
</ul>
When you create your own Site Map page in HTML, be sure to also include links in this list to any pages on your site that may not be linked through the main navigation. For instance, if your site includes Privacy Policy, Terms of Service, and Customer Support pages, add links to those pages to the bottom of the list, directly above the link to the Site Map page.
If you have any subpages, add those pages to the list as a subset of the main page they should be listed under, as shown in this example:
<ul>
 <li>Home</li>
 <li>About</li>
 <li>Products</li>
  <ul>
  <li>Silver</li>
  <li>Gold</li>
  </ul>
 <li>Press</li>
 <li>Stores</li>
 <li>Contact Us</li>
 <li>Site Map</li>
</ul>
For example, the Sugar Monkey website has no subpages below any of the main navigation links, so you can skip this step.
(Optional) If desired, type a descriptive sentence beneath each bullet item in the list to help visitors learn about what they can expect to find on each page.
A description like this can assist visitors viewing the pages as well as help search engines locate and index each of the pages on the site.
For example, if you were to add descriptions to the Sugar Monkey Site Map HTML page, one of your list items might look like this:
<li>About<br>
Learn about the founders of Sugar Monkey and get the real story behind Sugar Monkey’s success.</li>
Convert each of the page names in the list into hyperlinks to their respective pages on the site, making sure that each link includes its own title attribute.
For instance, if the about list item became a link to the About page, your code might look like this:
<li><a href="about.html" title="Learn About Sugar Monkey">About</a><br>
Learn about the founders of Sugar Monkey and get the real story behind Sugar Monkey’s success.</li>
Save your changes, close the sitemap.html file, and upload a copy of this file to the site’s remote host server.
Test the page as soon as possible and correct any typos or coding errors. If you make any changes, upload the corrected file to the remote host server.
No one will know about this page until you add a few links to make the page accessible to site visitors.