You can create an album with photos that share a keyword tag. For example, you might have a catalog with a number of photos taken on a European vacation. You can create keyword tags for files according to the country visited. You then might rate the best pictures you took on your trip. The highest-rated images could then be assembled in an album and viewed as a slide show.
Rating images
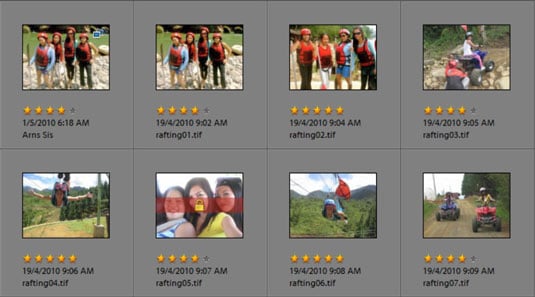
Rating photos is handled in the Properties panel. To assign a star rating to a file, right-click a photo and select Properties from that menu. The Properties - General panel opens. Click a star to rate the photo. Alternatively, click a photo, choose Edit→Ratings, and choose a star rating.
Adding rated files to an album
You might want to rate images with star ratings and then add all your images to an album. Within the album, you can still choose to view your pictures according to star ratings.Creating an album
With albums and star ratings, you can break down a collection into groups that you might want to mark for printing, sharing, or onscreen slide shows.To create an album, follow these steps:
-
Click the plus sign (+) icon on the Albums panel and choose New Album from the drop-down menu.
The Albums panel expands to show the Album Details.
-
Name the new album.
Type a name for the album in the Album Name text box.
-
Drag photos from the Organizer to the items window in the Album Content panel.
Alternatively, you can select photos in the Organizer and click the plus sign (+) icon to add them to the album.
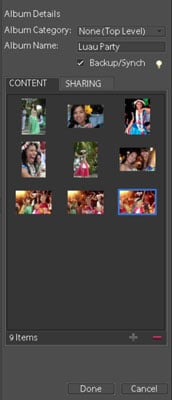 Drag photos to the Items area in the Album Contents panel.
 -
Click Done at the bottom of the panel.
Your new album now appears listed in the Albums panel. You can isolate all the photos within a given album by clicking the album name in the Albums panel.
Creating a Smart Album
You can perform a search based on a number of different criteria. The Smart Album feature enables you to save the search results in an album. After you have all the files shown in the Organizer based on the searches you perform, you can create a Smart Album as follows:-
Open the New menu on the Albums panel and choose New Smart Album.
The New Smart Album dialog box opens.
-
Type a name for your new Smart Album.
-
Make selections for the search criteria below the Name text box.
You can search using multiple criteria by clicking the Plus (+) icon in the New Smart Album dialog box. Click the icon, and a new line appears.
-
Click OK.
The Smart Album is listed above the albums in the Albums panel.
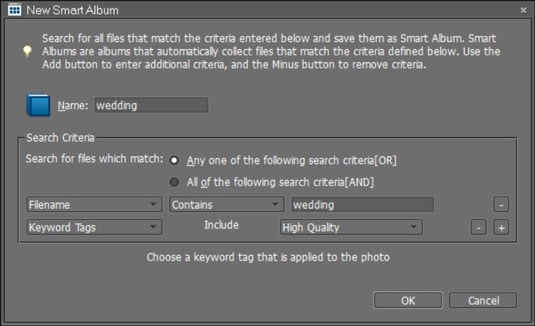 Type a name for your new Smart Album, add the search criteria, and click OK to add the album to the Albums panel.
Creating an Album Category
The Albums panel contains all the albums and Smart Albums you create in an organized list. By default, the albums are listed in alphabetical order. If you add many albums to the panel, the list can be long, making it difficult to find the album you want to use for a given editing session.
An Album Category is no more than a divider shown in the Albums panel. You don’t add photos to the group. You nest albums within a group in a hierarchical manner. To understand how to create an Album Category, follow these steps:-
Create several albums.
To begin, you should have two or more albums added to the Albums panel.
-
Create an Album Category by clicking the New menu on the Albums panel and choosing New Album Category.
The Create Album Category dialog box opens.
-
Type a name for the group in the Album Category Name text box and then click OK.
You new Album Category is added to the Albums panel.
-
Click and drag an album onto the Album Category name in the Albums panel.
The albums you drag to the Album Category are nested within the group.
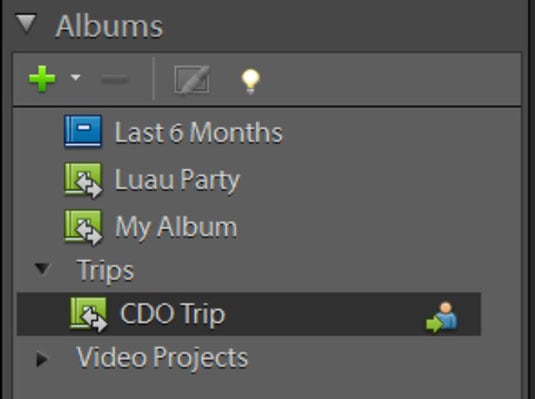 Albums are nested below an Album Category.