
If none of the preset White Balance options on the Canon EOS 70D produces the right amount of color correction, you can create your own, custom setting. To use this technique, you need a piece of card stock that's either neutral gray or absolute white — not eggshell white, sand white, or any other close-but-not-perfect white. (You can buy reference cards made just for this purpose in many camera stores for less than $20.)
Position the reference card so that it receives the same lighting you'll use for your photo. Then follow these steps:
Set the camera to the P, Tv, Av, M, or C exposure mode.
You can't create a custom setting in any of the fully automatic modes or in B (Bulb) mode.
Set the White Balance setting to Auto (AWB).
Set the lens to manual focusing.
This step helps because the camera may have a hard time autofocusing on the card stock.
Frame the shot so that your reference card fills the center area of the viewfinder.
Make sure that at least the center autofocus point and the six surrounding points fall over the reference card.
Set focus and make sure that the exposure settings are correct.
Just press the shutter button halfway to check exposure. If necessary, adjust ISO, aperture, or shutter speed to get a proper exposure.
Take the picture of your reference card.
The camera will use this picture to establish your custom White Balance setting.
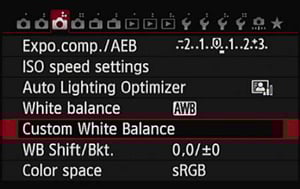
Display Shooting Menu 3 and choose Custom White Balance, as shown in the following figure.
After you select the option, you see the screen shown on the left in the figure below. The image you just captured should appear. If it doesn't, use the normal playback controls to scroll to it. (Note that you may see additional data on the screen depending on the current playback display mode; press the Info button to cycle through the various displays.)
Tap the Set icon (or press the Set button).
You see the message shown on the right in the figure below, asking you to confirm that you want the camera to use the image to create the custom White Balance setting.
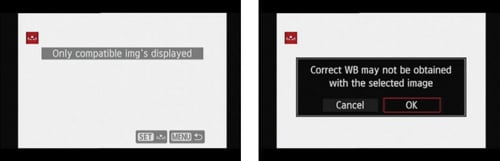 Your white image appears on the screen (left); press or tap Set and then confirm that you want to store that image as your White Balance preset (right).
Tap OK or highlight it and press the Set button.
Now you see the screen shown on the right in the figure below. This message tells you that the White Balance setting is now stored. The little icon in the message area represents the custom setting.
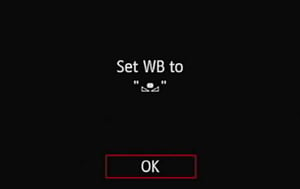
Tap OK (or highlight it and press Set).
Your custom White Balance setting remains stored until the next time you work your way through these steps. Any time you're shooting in the same lighting conditions and want to apply the same White Balance correction, just select the Custom option as your White Balance setting. Remember, the icon for that setting looks like the one on the screen in the above figure.