
Goats sometimes choose to sleep outside, depending on the weather. But they need to have access to a secure indoor area to sleep in. You meet that desire by building them a sleeping shelf. You can build a sleeping shelf for your goats in an existing barn, garage, or other building. You need very few materials to build it.
Although the directions here are for a triangular corner shelf, you can modify them to fit your particular building, or you can even make one along a full side of your building. This shelf is set 14 inches from the ground, which is a good height for miniature and full-size goats. These directions assume that the corner of your barn is square.
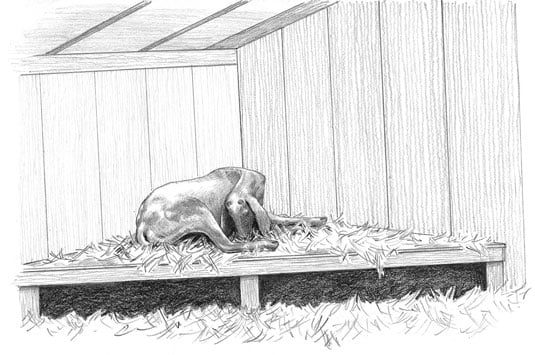
An added benefit of a sleeping shelf like this is that kids like the safety of an enclosed area where they can’t get stepped on, and they curl up underneath it when they aren’t sleeping with their moms.
First, gather your tools and materials:
One piece of 5/8-inch plywood (4 feet x 8 feet)
Four 8-foot 2 x 4s (one for each side brace, one for center braces and one for front)
One pressure-treated 28-inch 4 x 4
Two dozen 1 1/4-inch screws or nails
Two dozen 2 1/2-inch screws
Pencil
Level
Circular saw
Screwdriver (preferably battery- or electric-powered)
Hammer
Here’s how you build your shelf:
Cut the plywood into a triangle with one 8-foot side and two 68-inch sides.
Draw a line from each bottom corner to the top center line. Each line will be 68 inches long.
Place the plywood with 8-foot side across and measure and mark the center of the top (4 feet).
Cut the plywood with your saw along the two lines into three triangles. The center piece will be 8 feet on the bottom (full length of the plywood) and 68 inches on each side.
Cut your first two 2 x 4s.
Cut 65 inches from one 2 x 4 and 63.5 inches from another, making a 45-degree angle at one end of each.
Cut your third 2 x 4.
Cut two 42.5-inch pieces with one end of each at a 45degree angle. Fasten them together lengthwise with five 2-1/2 inch screws, making sure that the longer points of the angles are together.
Cut your 4 x 4 in half.
This creates two 14-inch pieces.
Measure and draw a level line 14 inches from the floor on the walls where you will set the frame of the sleeping shelf.
Using two screws or nails, attach the 63.5 inch piece of 2 x 4 (left side) to the 65-inch piece of 2 x 4, making a V.
The flat end of the 65-inch piece should be level with the side of the 63.5 inch piece.
Attach the 8-foot 2 x 4 to each end of the V piece with two 2-1/2 inch screws on each side through the 8-foot piece.
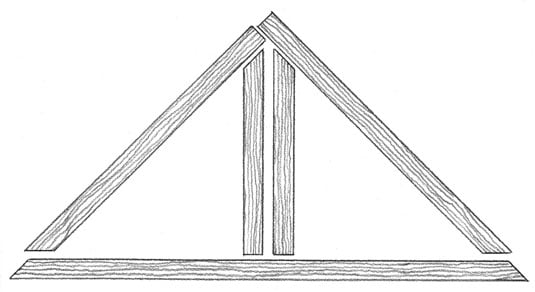 Sleeping shelf frame assembly.
You now have a triangular frame.
Attach the combined support pieces to the frame.
Mark the center (4 feet) of the long piece of your triangular frame. Attach the combined 44-1/2 inch piece to the frame with two 2-1/2 inch screws or nails on the pointed end and four screws or nails on the flat end, with the 45-degree angles abutting the two shorter pieces and the flat end abutting the center point of the front piece. The center of the two pieces should line up with your center mark.
Place one of the 14-inch 4 x 4s upright on the top corner of the frame so that it is perpendicular to and flush with one side. Attach it to the frame with approximately six 2-1/2-inch screws at angles starting at approximately one inch from the end of the 4 x 4.
Repeat Step 9 for the front support, with your support piece upright and flush with the front of the bottom of the frame.
For additional strength, you can add more floor supports on each side of the frame.
Turn the frame over and place in the corner of your building. Check it with a level, then securely attach with a 2-1/2-inch screw every 10 inches or so in solid wall.
If your walls are not square, use shims between the frame and wall when attaching the frame.
Attach the piece of plywood to the top with 1-1/4-inch screws every 8 inches or so.
You won’t even have to invite your goats to get up on the shelf. Within a few minutes after you finish it, they’ll be jumping on the shelf and competing for the choice spot.