A new custom app in SharePoint displays a single text Title column. The list also contains several behind-the-scenes columns that you can’t see, such as ID and Version. To make the custom app your own, you have to add columns to the app.
Columns are like fields in a database table. When you add a column to your app, a data entry field appears in the app’s New Form to give you a place to enter data into that column.
A little planning goes a long way. You created a plan for your custom app, right? Because now is when you start adding the columns to your app in SharePoint that you listed in your plan.
You can also add columns to the predefined SharePoint apps.
Follow these steps to add columns to your custom app:
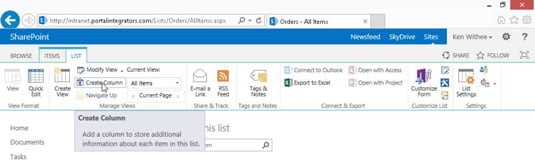
With your app open in the browser, click the List tab on the Ribbon, and then click the Create Column button in the Manage Views group.
The Create Column window appears.
You can also add new columns with the List Settings page.
Type a name for your new column in the Column Name field.
The name you type is what users will see, so pick a name that’s concise but meaningful. It’s not recommended to use spaces in your column names when you first create them. You can always add spaces later.
Spaces entered in a column name become a permanent part of that column’s internal name in SharePoint. Some of these internal names can get quite lengthy and downright nonsensical, which makes referencing them a real pain.
Select the type of information you want to store in the column.
The options given here are fairly intuitive — Single Line of Text, Number, Date and Time, and so on.
Make sure you determine what kind of data you have when you first create the column. Changing the data type later may result in loss of data, or you may not have as many options when you change the type.
In the Additional Column Settings section, select the options that further define your column’s type.
The column type you select in Step 3 determines what options you have available for configuring the column.
(Optional) If you want SharePoint to test the values entered into your column, use the Column Validation section to enter your formula.
Click OK.
SharePoint adds the column to your custom app.
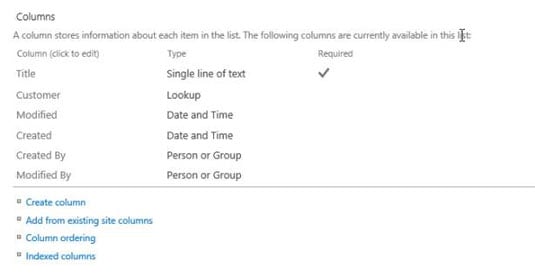
You can change the column properties later and rearrange the order of the columns by using the List Settings page.
After you first create a custom app, use the List or Library Settings page to modify your app, where you have all the commands at your fingertips to power through the column creation — you can pick site columns, create your own columns, and rearrange them.
After your app has been created and you need to add more columns, the Create Column button on the List tab of the Ribbon is a handy way to add one or two columns without leaving the main page.