
If small spots appear consistently on your images — and you know that dirt on the lens of your Rebel T6i/750D isn't the cause — your sensor may need cleaning. Don't clean the sensor yourself because you can easily ruin your camera if you don't know what you're doing. Instead, take the camera to a good repair shop for cleaning.
Until you can have the camera cleaned, however, you can use a software‐based dust‐removal filter found in Digital Photo Professional, one of the programs that ships with your camera. You start by recording a data file that maps the location of the dust spots on the sensor. To do this, you need a white piece of paper and the kit lens. Then take these steps:
Set the lens focal length at 50mm or longer.
Switch the lens to manual focusing and set focus at infinity.
Hold the camera normally and then turn the lens focusing ring counter‐clockwise until it stops.
Set the camera to the P, Tv, Av, or M exposure mode.
You can create the dust data file only in these modes.
Display Shooting Menu 3 and choose Dust Delete Data, as shown on the left.
You see the message shown on the right.
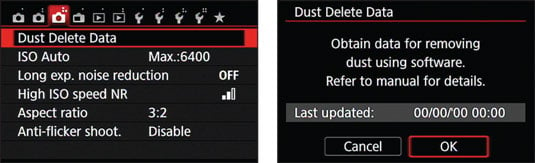 You can record dust‐removal data that can be read by Digital Photo Professional.
Choose OK.
Position the white paper 8 to 12 inches from the camera and make sure that the paper fills the viewfinder.
Press the shutter button all the way to record the data.
No picture is taken; the camera just records the Dust Delete Data in its internal memory. If the process was successful, you see the message "Data obtained."
If the camera can't record the data, the lighting conditions are likely to blame. Make sure that the lighting is even across the entire surface of your paper and that the paper is sufficiently illuminated, and then try again.
On the Data Obtained screen, choose OK.
The current date appears on the initial Dust Delete Data screen. (Refer to the right screen.)
After you create your Dust Delete Data file, the camera attaches the data to every image you shoot. To clean a photo, open Digital Photo Professional and select the photo's thumbnail in the main window. Choose Adjustment→Apply Dust Delete Data if you want to get right to it. You can also double‐click the thumbnail. The photo then appears in a preview window. Select the Dust Delete/Copy Stamp tool palette and then click the Apply Dust Delete Data button to start the dust‐busting feature. The program's manual offers details.