


Windows 7 is designed around networking. Consequently, Microsoft has designed it to be easy to add a network printer to a HomeGroup network using Windows 7. And thanks to HomeGroup networking, when you add a printer to a computer in the HomeGroup network, Windows automatically recognizes it and adds it to the Device Stage on every computer in the HomeGroup.
With Windows 7, you can have both regular networks and HomeGroup networks. As long as a printer (or other device) is attached to a computer within your network, you can add it to your HomeGroup, even if the computer its attached to isn’t going to be part of the HomeGroup.
Choose Start→Devices and Printers.
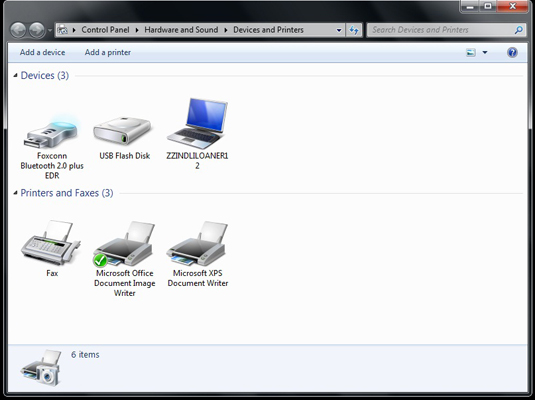
You see the Device Stage list. You may or may not have any printers indicated at this point.
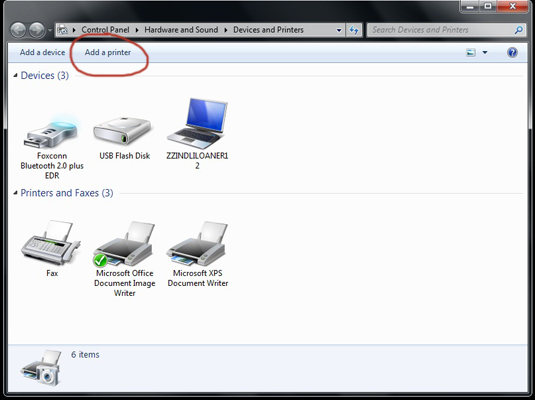
At the top, click the Add a Printer button.
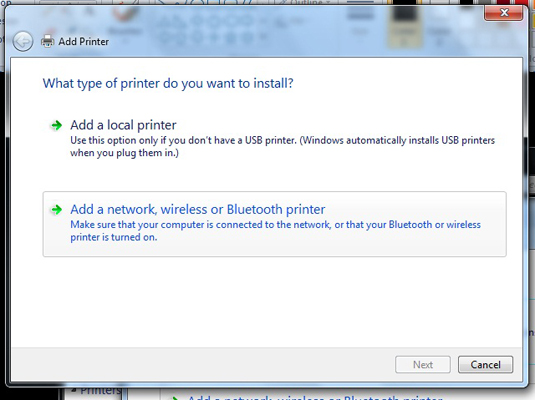
Windows 7 asks whether you want to add a local printer or a network, wireless, or Bluetooth printer.
Click the Add a Network, Wireless, or Bluetooth Printer paragraph.
Windows starts searching for printers throughout your entire network. Usually, it finds the printer you want. Sometimes it doesn’t. The wizard should show you a list of found printers.
If you see your printer in the list, go to the next step. If Windows isn’t finding it, click the Stop button and then click The Printer That I Want Isn’t Listed. Click the Browse button and then locate the printer on your network.
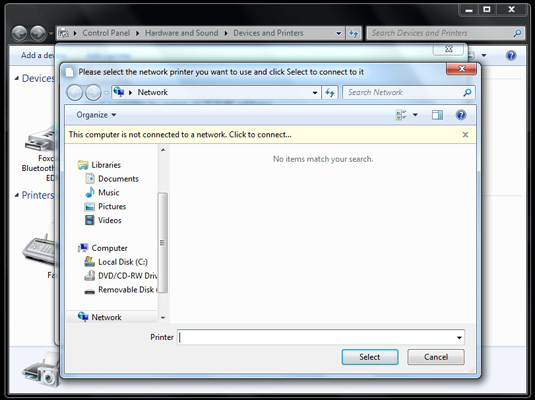
If the wizard doesn’t display the printer you want to install, you can install it by typing its name into the Printer text box under the Select a Shared Printer by Name option. The name should be in the form \hostprinter
Substitute for host the name of the printer’s host computer. Substitute for printer the share name of the shared printer (look on the host computer’s Printers list). The completed name should look something like this: \DimensionLJ4.
Select the printer, click the OK button, and click the Next button.
Windows asks Do You Trust This Printer?
Click Install Driver. Then click Next.
Windows whirs and clanks for a while and then asks whether you want to make the new printer your default printer.
Select the default printer and click Finish.
Your new printer appears in the Device Stage list. Notice that the Device Stage lists the type of printer and tells you which computer it is attached to — in this case, Tamgaan (a Windows XP computer).

