When you begin building beehives, saving money is always tempting, but think about the long term as you build your beehives. When you compromise quality early on, you pay for it later on. Avoid the temptation.
Don’t go cheap on materials
Remember to use galvanized nails that don’t rust, outdoor quality plywood that holds up better to the elements, and weatherproof glue that doesn’t deteriorate.
These things may cost you a little more upfront, but they’ll surely make your hives last longer. Don’t cut corners. Pay for materials that will last a long time. You ultimately get what you pay for.
Keep a build log for your beehives
Keeping notes on when you build various hive parts and components is a good idea. Referring to your build log occasionally helps you determine when it may be time to consider replacing parts.
Establish an inspection routine
Every time you visit your colonies, you look to see how the bees are doing. Do they have enough room to expand? Is the queen present and laying eggs? Is the brood pattern good? Do the bees look healthy? All this and more is a standard part of every inspection.
But inspections are about more than just the bees. Use these opportunities to inspect your equipment as well. Do you need to address any issues?
An inspection notebook is a great way to keep track of the status of your colonies as well as the status of your woodenware.
Prepare your hives for winter
If you live in an area that experiences any degree of cold winter (where average temperatures drop below 40 degrees), you need to get your hives ready for winter. First, remove your extracted honey supers and store them inside. A garage or basement is ideal. That way they stay out of the elements.
Honey supers stored over the winter often get infested with wax moths. It happens. What a disheartening sight to discover the damage they can do to your newly built frames and foundation.
During your final hive inspection of the season, use your hive tool to scrape off any excess comb and propolis from the frames and hive bodies. Doing so makes manipulating the hive components in the spring easier and puts far less stress on these parts.
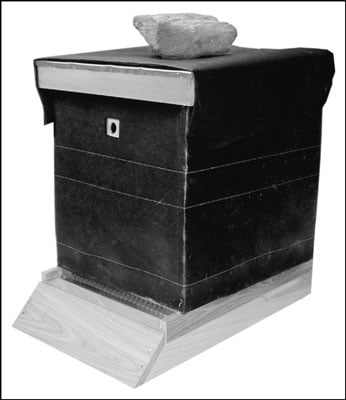
Wrap the hive in black tar paper (the kind used by roofers). Make sure that you don’t cover the entrance or any ventilation holes. The black tar paper absorbs heat from the winter sun, helps the colony better regulate temperatures during cold spells, and protects the wood from the harsh weather.
Do some spring cleaning on your hive
In the spring, perform your first spring inspection of the hives, and take the opportunity to do some spring cleaning.
If you have a hive with a bottom board (such as the nuc, Warré, British National, or Langstroth), remove the hive bodies to expose the hive’s bottom board. Use your hive tool to scrape clean the bottom board of all debris.
Make yearly exterior touch-ups
Your hives will last much longer if you protect all exposed wooden surfaces with a good quality outdoor paint, weatherproof polyurethane, or marine varnish.
Every year, check your hives in the late winter or very early spring to see whether you need to touch up the paint, polyurethane, or varnish. If it’s early enough in the spring and the bees aren’t yet flying, you can do these touch-ups in the field, with the bees safely clustered inside.
If the bees are already flying when you check the exterior, don’t paint or re-varnish your hives in the field. The flying bees would almost certainly get stuck in the wet paint or varnish. In this case, paint a newly assembled hive part indoors and bring it outside to swap out with the part that needs attention.
Repair the roof on your beehive
During any time of the year, if you see a roof in distress, you need to take action, not only to protect your bees from the elements but also to protect your woodenware.
Most hive plans call for aluminum flashing on the roof. It’s a great, long-lasting material for keeping the rain out and extending the life of your woodenware. You can use other materials on your hive roof to protect the wood and the bees.
Replace rotting wood on your hive
Sooner or later, your wood will rot. Some wood holds up better to the elements than others — namely, cedar and cypress. But when wood starts to go, there’s no saving it. It’s best to build a new part. Out with the old, and in with the new!
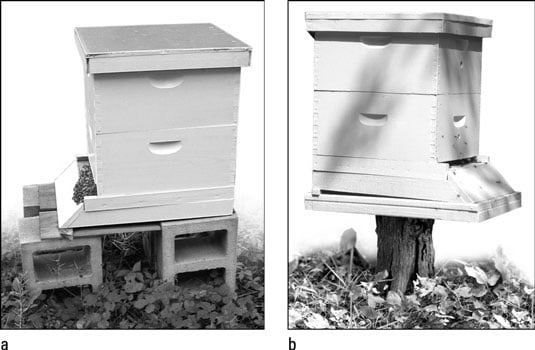
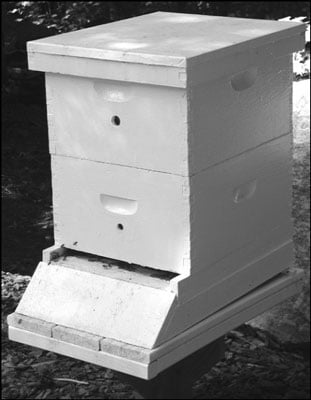
Elevate your hives
Wood rots much more quickly if it sits on the ground. Getting your hives off the damp ground is healthier for the bees and greatly extends the life of your woodenware.
Provide proper ventilation to your beehive
Proper ventilation is critical to maintaining the comfort and health of your bees. Good circulation also keeps moisture from building up inside the hive, compromising the longevity of your woodenware.
A useful way to ventilate a hive is to drill wine cork–sized holes in hive bodies and supers. Insert or remove the cork to control air circulation as needed.
Guard against bears with an electric fence
Do bears like honey? Indeed they do! And they simply crave the sweet bee brood. If bears are active in your area (they’re in a number of areas within the United States), taking steps to protect your hive from these lumbering marauders is a necessity.
The only really effective defense against these huge beasts is installing an electric fence around your apiary. Anything short of this just won’t work. Your state or local conservation department has information on installing such a fence. Some institutions may even provide financial assistance for the installation.