The easiest and most practical way to create rows and columns of text is to use the area type options in Adobe Illustrator. This feature lets you create rows and columns from any text area. You can have only rows, only columns (much like columns of text in a newspaper), or even both.
Select the Type tool and drag on the artboard to create a text area.
Choose Type→Area Type Options.
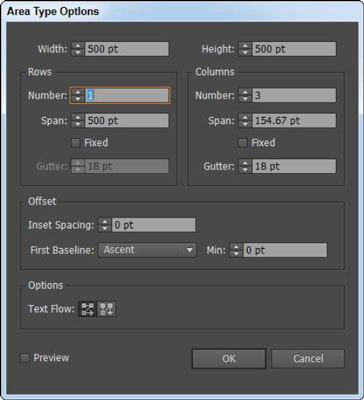
The Area Type Options dialog box appears, as shown in this figure.
 The Area Type Options dialog box lets you create columns of text.
In the Area Type Options dialog box, enter a width and height in the Width and Height text fields.
The Width and Height text fields contain the height and width of your entire text area. In this figure, 500 pt is in the Width text field and 500 pt is in the Height text field.
In the Columns area, enter the number of columns you want to create in the Number text field, the span distance in the Span text field, and the gutter space in the Gutter text field.
The span specifies the height of individual rows and the width of individual columns. The gutter is the space between columns and is automatically set for you, but you can change it to any value you like.
Click OK.
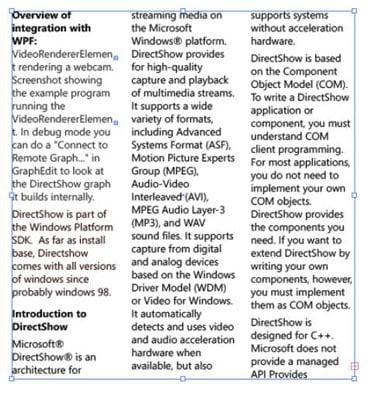
When you create two or more columns of text from the Area Type Options dialog box, text flows to the next column when you reach the end of the previous column, as shown in this figure.


