
Installing a shower requires you to construct wood framing to support the walls of the enclosure. If you place the shower in a corner, you have to construct fewer walls. In any case, the manufacturer supplies a layout plan for the enclosure. Follow it carefully. You usually place the wall studs closer together than on a standard wall.
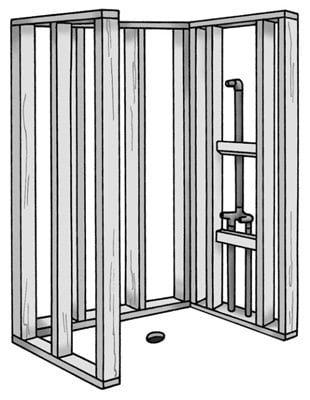
One advantage to installing this type of shower enclosure is that you mount the wall panels directly to the wall studs, so you don’t need drywall or backerboard. Before installing the shower stall, you can install wood backing for grab bars. Consult the manufacturer’s installation instructions to find out what type of backing you need to support a grab bar. In most cases, you should have solid backing of 2 x 6s nailed between the wall studs.
The shower enclosure requires a 2-inch drain centered in the enclosure. The rough-in dimensions give the exact measurements for its location. Unless you’re experienced with plumbing, you should leave this part of the project to a professional.
To install a shower enclosure, you need these materials:
2 x 4s or 2 x 6s
2-inch masking tape
Carpenter’s square
Dropcloth
Electric drill
Hammer
Hole saw or jigsaw with fine-tooth blade (32 teeth per inch)
Large-head nails
Level
Measuring tape
Pliers
Putty knife
Screwdrivers
Silicone sealant (for shower door installation)
Utility knife
Woodworking tools
After you've created the enclosure, follow these instructions to install the shower:
Open the packaging and identify all the components of the enclosure.
Place the shower receptor in the enclosure and check that it’s level and doesn’t rock back and forth.
You may have to install shims under the receptor to level it. Put the necessary shims in place and retest the level of the shower. When the surface is stable, remove the shims one at a time, apply construction adhesive to them, and replace them.
Use galvanized roofing nails to secure the receptor to the wall framing.
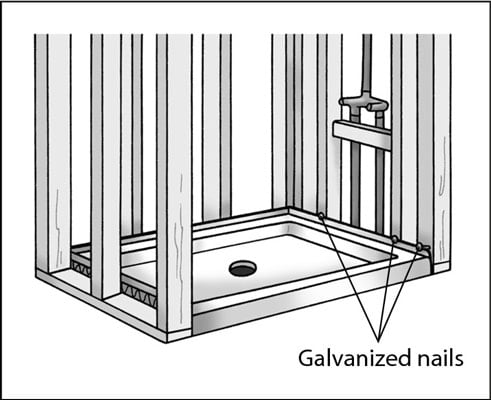
Follow the manufacturer’s recommendations and drive the nails through the predrilled flange holes, or place the nail against the top of the flange so that the head of the nail catches the flange.
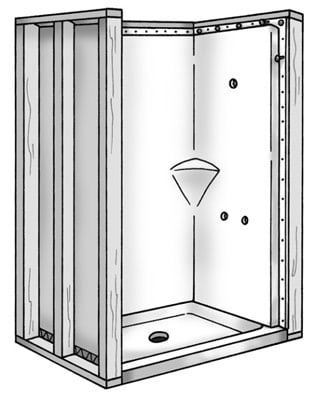
Position the panels in the enclosure.
Some kits have wall panels that interlock to form watertight seals. In this case, follow the manufacturer’s directions and position the panels in the enclosure in the proper sequence so that they can interlock.
Check that the panels fit snugly against the wall framing.
You can’t place the panel at the shower valve end of the enclosure against the studs yet because of the rough-in plumbing.
Mark the location of the shower valve and shower riser pipe by making a cardboard template of the location of the valve and shower head pipe.
Place the template on the shower enclosure panel and drill a pilot hole at the center of the cutout to guide the hole saw.
Use a hole saw or jigsaw with a fine-tooth blade to make the holes for the valve controls and the shower head pipe.
Install the shower wall panel on which the valve is located.
Check that you have all panels properly aligned and square and that you have the shower valve and shower head pipe properly aligned.
Fasten the panels to the wall framing with galvanized roofing nails.
Wherever you find a gap between the wall stud and the shower wall panel, insert a wood shim before driving the nail.
Apply silicone caulk to all joints in the enclosure.
Follow the manufacturer’s instructions and use a top-quality caulk.
Your next steps are to install the wall finish that covers the flange and complete the plumbing work before moving on to installing a shower door.