 ©Venus Angel/Shutterstock.com
5 Kitchen Tools to Use with Your Air Fryer
Nothing is worse than buying a new appliance that requires you to spend an extra hundred bucks in special gadgets, right? Rest assured, the air fryer does not require you to do that! Using those kitchen tools you already have on hand, your air-fried foods will come to life. And even if you’re not a cook and you need to invest in a few of the items listed here, they won’t cost you an arm and a leg and you’ll find multiple uses for them in your home.
Here are five air-fryer-friendly kitchen tools to have on hand:
- Silicone muffin liners: Make your muffins come to life with silicone muffin liners. Heat stable and perfectly portioned, silicone muffin liners allow you to bring the beauty of breads to the comfort of your own kitchen. Plus, you can even make baked eggs in them.
- Seven-inch springform (Bundt) pan: Cheesecakes and coffee cakes have a seat at your table when you invest in one of these (usually sold as a convertible cake and Bundt cake pan). You can enjoy a bakery-fresh slice of cake for less than a fraction of the cost.
- Seven-inch oven-safe casserole dish: Most air fryers don’t exceed 400 degrees, meaning the same small casserole dish that withstands your oven temperatures will be safe in your air fryer, too. From glass to metal to silicone, the air fryer should accommodate them all!
All air fryers are slightly different, so if you have any uncertainty, check the manual for your specific model.
- Metal skewers: Take those skewers from the grill and use them in your air fryer to help evenly cook thicker cuts of meat. Depending on the type of air fryer you have, the skewers may (or may not) be too big for your fryer. If you’re on the fence about skewers that will fit your air fryer, you can use wooden sticks (just be cautious of the temperature so you don’t catch them on fire).
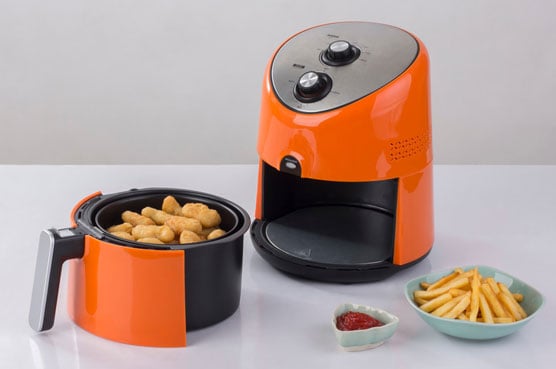
- Kitchen tongs: Using a pair of kitchen tongs is essential to ensure you don’t burn another finger trying to get that last chip that’s nestled itself on the side of the fryer basket.
5 Ways to Prevent Air Frying Your Food to a Crisp
When cooking certain foods at high temperatures, charring can occur. That charring produces a chemical called acrylamide. And acrylamide might be linked to an increased risk of cancer. It’s important to note that, according to the American Cancer Society, “It’s not yet clear if the levels of acrylamide in foods raise cancer risk. . . .” Still, you can take some steps to avoid frying foods to a crisp. Here’s what we recommend:
- Cook at lower temperatures for longer periods of time (instead of high temperatures for shorter periods). Turning the temperature knob down to 300 to 325 degrees and increasing the time to 10 or 20 minutes may prevent charred coffee cake and blackened fries.
- Cover foods with foil. The air fryer works to cook your foods by circulating air throughout the basket, so you don’t want to prevent that air flow. However, you can use foil to cover a chicken breast, for example, and place it in the basket to cook (low and slow). We also suggest using foil to cover cakes and egg dishes to prevent the top from cooking too quickly. Just be sure there is enough room between the foil and the top of the air fryer.
- Don’t overfill the basket. You may be tempted to throw the entire batch of beet chips or broccoli florets into the basket at once to save time, but that will result in uneven cooking and a few pieces getting burned to a crisp. Either invest in a larger fryer or cook in smaller batches to produce the perfect air-fried foods every time.
- Use air-fryer-safe equipment. The key to producing bakery-perfect muffins or quick breads lies in making sure you’re using the right equipment. Using the right equipment helps allow the air to circulate properly, leaving your air-fried foods crisp, crunchy, and evenly cooked.
- Set timers and reminders. We all need to set alarms to remember important things, and air frying your foods is no different. Set timers not only on your air fryer but on your phone so you don’t leave the foods cooking any longer than required.
Air Frying on the Road
If you travel in an RV, you know space is tight. And yet many RVers are adding an air fryer to their tiny kitchens. Why? Because nothing beats an air fryer for reheating food with ease, making your favorite chicken wings without heating up your RV, and enjoying fresh baked cookies after a long day of hiking. But before you pack up, you need to understand the electrical requirements of both your vehicle and your air fryer, so be sure to review your camper’s electrical needs first.
When you’ve determined that your air fryer will work in your vehicle, you’re ready to get cooking! The following simple meals will be perfect for your next road trip:
- Chicken wings: This popular appetizer can be made in the comfort of your RV or camper in 22 minutes! Just season with salt and pepper and cook at 370 degrees for 22 minutes, flipping a couple times. Then finish off with your favorite hot sauce heated up with melted butter. Serve the wings with blue-cheese-stuffed celery, and call it a meal!
- Steak and potatoes: Who doesn’t appreciate a good steak while taking in another stellar sunset? Dice potatoes and season with salt and pepper. Then cook at 360 degrees for 5 minutes. Season the steak with salt and pepper and place it in the air fryer basket next to the potatoes. Spray the food with cooking spray, crank up the heat to 390 degrees, and cook for 12 minutes, flipping the steak and shaking the potatoes after 6 minutes. Let the steak rest for 5 minutes, and serve with a simple salad to complete the meal.
- Crispy chimichangas: Whether it’s for breakfast, lunch, or dinner, a chimichanga is an easy addition to your meal rotation. Try a simple bean and cheese chimichanga by spreading refried beans onto a tortilla, topping with shredded cheese, and rolling up like a sealed burrito. Spray the chimichanga with cooking spray and cook at 360 degrees for 8 to 10 minutes.
- BLT: Bacon comes out perfectly in an air fryer, without splattering grease all over your living space. Cook the bacon at 390 degrees for 8 to 10 minutes (or how you like it). Remove the bacon onto a paper towel. Then brush your bread with mayo and place it in the basket. Cook at 370 degrees for 2 minutes. Top with lettuce, tomato, and crispy bacon for a warm lunch!
- Frozen pizzas: Oh yes, that’s right! You can now pick up your favorite frozen fare — from pizzas to Hot Pockets — at a grocery store instead of waiting in line at a restaurant. Be sure to pick up the individual sizes. Whip up a salad from a bag to complete the meal.