Knitting the rib stitch creates ribs, or textured vertical stripes. The rib stitch consists of columns of knit stitches alternating with columns of purl stitches. To make a ribbed pattern, you change from knit stitches to purl stitches within a row — instead of alternating knit rows with purl rows (as you do when making horizontal stripes).
The most common ribbing combinations are those that are even (that is, the rib uses the same number of knitted versus purl columns):
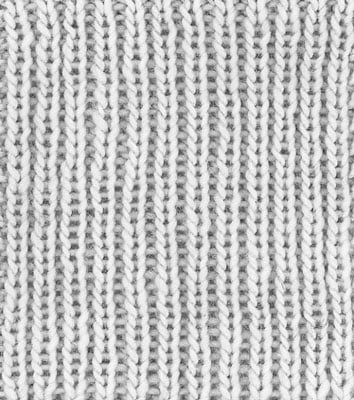
1 x 1 ribbing: Single knit stitches alternate with single purl stitches, creating very narrow columns. To create 1 x 1 ribbing, cast on an even number of stitches. Next, work every row: *K1, p1; rep from * to end of row. Repeat this row for the length of your piece.
This sample of 1 x 1 ribbing shows the ribbing stretched out a bit so that you can see the purl rows (the horizontal lines in the background). When it isn’t stretched out, the knit columns contract, hiding the purl columns.
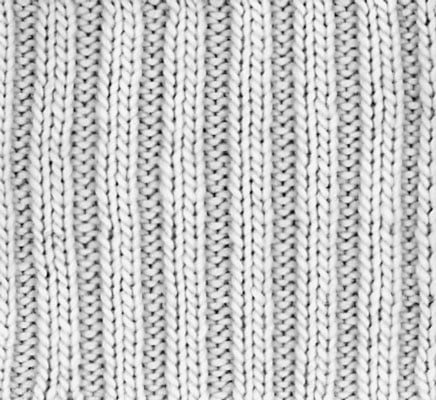
2 x 2 ribbing: Alternates 2 knit stitches with 2 purl stitches. It pulls in slightly less than 1 x 1 ribbing. To create 2 x 2 ribbing, cast on a multiple of 4 stitches. Next, work every row: *K2, p2; rep from * to end of row. Repeat this row for the length of your piece.
If you want your piece to begin and end on 2 knit stitches, add 2 to the multiple that you cast on at the beginning.
The elasticity of the final ribbed fabric is affected by:
Column width: The narrower the column of stitches, the more elastic the ribbing.
Needle size: Bigger needles result in less elasticity. Also, because ribbed edgings are intended to “hug” the body, you generally work them on needles one or two sizes smaller than the ones used for the body of the project.