These instructions assume that you’re using a monitor or TV, but there is also an official Raspberry Pi touchscreen that connects using the Display socket on the left of the board (not available on the Pi Zero or Zero W).
Connecting an HDMI or DVI display
On the top surface of your board, on the bottom edge, is the HDMI connector. If you're using a Raspberry Pi Zero, you should have an adapter to convert the Mini HDMI to an HDMI socket. Insert your HDMI cable in the Raspberry Pi board or the Pi Zero converter, and then insert the other end into your monitor.If you have a DVI display rather than a HDMI display, you need to use an adapter on the screen end of the cable. The adapter itself is a simple plug, so you just plug the HDMI cable into the adapter and then plug the adapter into your monitor and turn the silver screws on the adapter to hold the cable in place. This image shows the HDMI cable lined up for insertion into the DVI adapter.
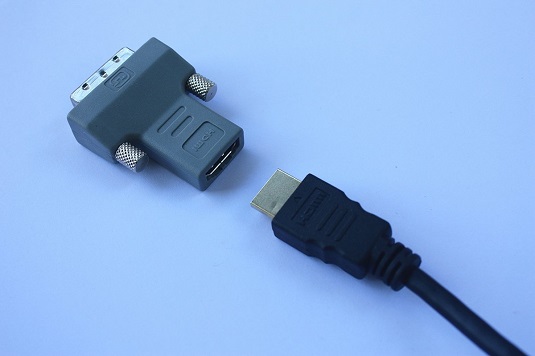 How the HDMI cable is inserted into the DVI converter.
Connecting a television using composite video
If your television has an HDMI socket, use that socket for optimal results. Alternatively, you can use the composite video socket. On the Model A and B, it’s a round, yellow-and-silver socket on the top edge of the board. On the Raspberry Pi 3, Pi 2, and Model B+, it’s the same socket as the audio output on the bottom of the board. You’ll need to use a special RCA cable for this socket and you can’t just connect an audio cable.Connect your RCA cable to the socket, and the other end to the Video In socket on your television, which is likely to be silver-and-yellow.
You might need to use your TV’s remote control to switch your television over to view the external signal coming from the Raspberry Pi. If you’re using HDMI on your TV, you might need to turn on the TV so that the Raspberry Pi can detect it when you switch it on.
If you're using NOOBS, it will try to use an HDMI monitor by default, even if there isn't one connected. To force NOOBS to use the RCA cable, you need to go into the recovery options for NOOBS and then press 3 for a PAL screen (common in the U.K.) or 4 for an NTSC screen (common in the U.S.). If you have an HDMI screen or TV that you can plug in just while you set up your Pi, that's probably the easiest option.Otherwise, you need to switch on the Pi, wait a few seconds, and then press and hold Shift for about ten seconds when it's telling you to do so, and then press the number key for your output options when it's gone into the recovery menu. It's difficult to get the timing right on this when you can't see anything on your screen yet! Sean tried it a few times before resorting to plugging in an HDMI screen at the same time as the TV screen.
Note that the Pi Zero and Zero W do not have a composite video socket, but they do have composite video output. You can solder your own connector to the board where it’s labelled TV. Check here for connection instructions.