
The best laptops make changing a hard drive as easy as swapping a battery. In the below figure you can see one example of a laptop hard drive in a carrier and the empty bay awaiting its installation.
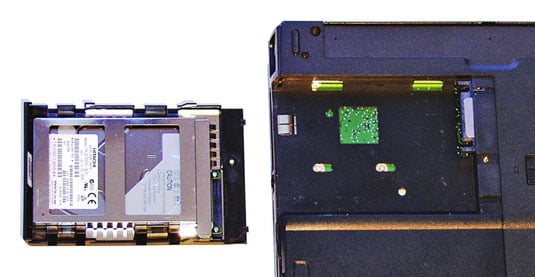
Turned on its back, you can see how this particular hard disk carrier design holds a drive in a cage; the data and power connectors plug into mating ports in the laptop.
Always remove both the AC adapter and the laptop’s battery before handling any of the laptop’s internal parts. Don’t take the chance of having any electrical power in the laptop that could be shorted out by a tool, screw, or other conducting material.
Follow these basic steps for working with a drive that’s already installed in a carrier designed for your laptop:
Turn off the laptop.
Unplug the AC adapter.
Prepare your work area.
You want a clean, well-lit, and stable surface. Place a soft cloth or other cushioning material to protect the top of the laptop; you can use almost anything that isn’t metallic or packing an electric charge.
Remove the battery.
Ground yourself before touching the old drive, and again before opening the bag or box that holds the new drive.
Ground yourself by touching the middle screw on an electrical wall outlet, or by touching a metal pipe.
Locate the hard disk drive compartment or bay.
Your laptop instruction manual should include a chart showing its position.
Unscrew any locking screws that may be holding the drive in place, or unlatch any catches.
Set aside the screws in a safe place; make notes on any unusual steps you had to take.
Slide or lift the hard drive out of its bay or compartment.
Reverse the steps to install, latch, and power up the new drive.