
Enabling your website to accept PayPal payments is as simple as placing the PayPal button on your site. To create a payment button on your site, first sign in to your PayPal account. From there, follow these steps:
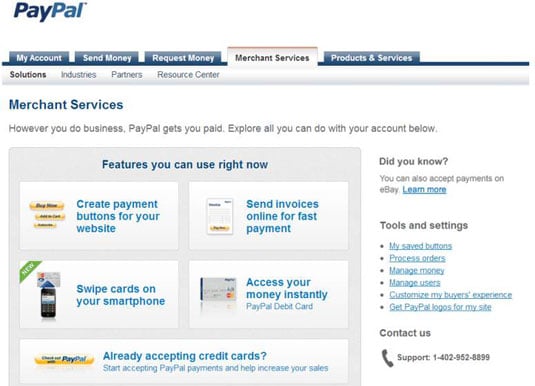
Click the Merchant Services tab, at the top of the page.
You arrive at the Merchant Services area.

Click the Create Payment Buttons for Your website link.
On the resulting page, click the Create Buttons button.
You see the page where you create buttons for the items you’re selling on your site.
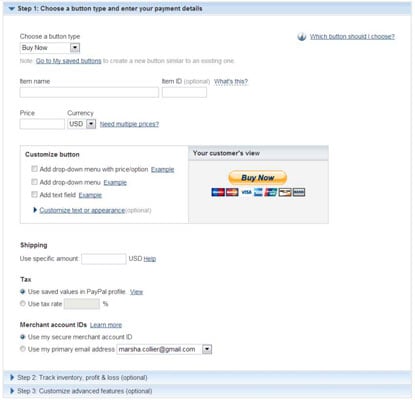
From the drop-down list, select the type of button you want to use to accept payments.
PayPal enables you to customize the buttons by clicking the Customize Text or Appearance link under Customize Button on the left.
Enter your item information, including the item name, ID, price, currency, shipping amount, and tax.
Here’s a list of all the items you’re asked to enter:
Item name: Type in the name of the product (or service) you will sell with this button.
Item ID (optional): Give your item an ID number or use the standard SKU for the product.
Price: Enter the item price here.
Currency: Decide what currency you’re accepting for your purchases. (If you’re in the United States, go for the dollars.)
Customize Button options: If your item has options (if, for example, it comes in different sizes or colors), you can create a custom drop-down list for your payment page so the customer can choose.
Shipping: Enter the amount you charge to ship the item.
Tax: Select your state and enter the appropriate sales tax to be applied to your in-state purchases. If you already have a sales-tax provision in your PayPal profile, you see it listed here. PayPal automatically applies the sales tax for sales shipped within your state.
If you don’t like the button you chose as it’s pictured, click the Customize Text or Appearance link in the Customize Button section to see more options.
Click the Step 2 tab for the option to track inventory.
Unless you want to update your button every time you receive new merchandise, leave this option blank.
If you want to add custom features, click the Step 3: Customize Advanced Features (Optional) tab.
On this tab, you can add extended options for your button. Included (definitely use these!) are the following:
Quantity: If you’d like your customers to be able to purchase more than one of your item at a time, you may indicate that here by giving the buyers a quantity field to fill in.
Allow customer to add special instructions: If you’d like your buyers to be able to write you a note (40 character limit), select the Yes check box.
Shipping address: Select the Yes check box if you’d like the customer’s shipping address.
Insert your logo: To add a logo to your payment page, type the URL where the file is stored. PayPal will place the logo on your payment page.
The logo you use must be sized at 150 x 50 pixels or PayPal won’t accept it.
Checkout landing page: If you want your customers to land on a specific page after they’ve purchased an item — setting up a thank-you page on your website is a nice idea, for example — enter that URL here.
Cancel Transaction page: If you want to include a page where people are taken if they cancel the transaction before completing it, you can insert that address here. If you don’t specify a page, they will land at a PayPal web page that allows cancellation of the transaction.
Click Preview.
You see a sample of the page your customer will see after making a web payment to you.
If the page is okay, click the Create Button Now button.
If you want to go back and edit, click the Edit button.
That’s all there is to creating your first Buy Now button and the payment page that appears when it’s clicked. When you get the hang of it for one item, you can reuse many of the settings for other items that you sell.